Friday 30 September 2016

Intro + History of Animation - Spencer's Lecture

This is the first lecture that we had with Spencer on our Friday Afternoon Sessions, within this lecture we firstly started to talk about an introduction into what we will be covering this year and the topics and subjects that we will be focusing on in Second Year. We were then given the list of topics that we would looking into which I have displayed below:

1 - Histor(ies) of Animation

2 - Histor(ies) of Design

3 - Claiming Expanded Practice for Design and Animation. 
Looking at Suzanne Buchan and Alice Twemlow

4 - Emigre & 8VO - The Legibility Wars in Graphic Design
Looking at Rudy Vanderlans and Zuzana Licko

5 - Animated Documentary - Barefoot Gen
Looking at Keiji Nakazawa, Mori Masaki and Thomas Lamarre

6 - Outdoor Culture, Design, Creativity and Affect 
Looking at NeuBau Forst Catalogue and Jeff Bowman

7 - Tom Gunning - The Cinema of Attractions 
Looking at Tom Gunning, Wanda Strauven, Norman Klein and Eric Jenkins

8 - Design, Action and Surface 
Looking at Tereza Rullerova and considering design as a mode of performance

9 - Lev Manovich - Software Take Comand
Looking at the first cultural theorisation of After Effects, also considering the Database cinema in the context of his Language of New Media

10 - Graphic Novels - Comics, Essentialism and Unflattering
Looking at Scott McCloud, Marshall McLuhan and Nick Sousanis

11 - Graphesis: Data Visualisation & Infographics in Science, Humanities, Art and Design 
Looking at Johanna Drucker, David McCandless and Edward Tufte

12 - Visual and Procedural Rhetoric 
Looking at Carolyn Handa, Laurie Gries and Ian Bogost

13 - Japan - The Theory and Appeal of Giant Monsters: Animated Bestiary
Looking at Jase Short, Paul Well and Studio Ghibli

14 - Rick Poynor on JG Ballard (The Covers of Crash) 
Looking at Rick Poyner, David Cronenberg (Crash) and Ben Wheatley (High Rise)

15 - Paul Wells - Animation, Subjectivity and Adaptation

16 - Ellen Lupton and Abbot Miller - Deconstructive Design Theory
Looking at Ellen Lupton, N. Katherine Hayles, Mark z. Danielewski and Jacques Derrida

17 - Animation and Film Theory 
Looking at General Readings from Animation and Film Theory

18 - Design, Animations and Subliminal Advertising (Past and Present)
Looking at Ellen Lupton, Robert Heath and Brian Key

19 - Maureen Furniss - Animation and Gender Representation 

20 - Kristine Niedderer - Making and Breaking Affordance in Design
Looking at Kristine Niedderer, Donald Norman and Experimental Jetset

21 - Matters of Gravity (Supermen and Special Effects in the 20th Century)
Looking at Scott Bukatam

22 - Graphic Design, Politics and Sustainability 
Looking at Tony Fry. 

In the second part of this lecture we looked at the Histories of Animation, we then started by looking at an animation called the Wolfman by Tim Hope, I found that this animation was about a girl that was walking through the woods as she was doing this the music that was being played alongside the film made it very creepy and quite scary to give it an effect that would stand out to the target audience. The use of slow motion in the animation added an extra to the design that also made it quite scary like the Wolfman was after the girl that walking through the woods. The animation was made in 1999 for a PS2 advert, I found that Tim Hope wanted the design to stand out and was an computer graphics animation that went against its 'realism' of it's time, I think that it definitely did that because he had created an animation that was just like any other animations that I had seen before.


The next animation that we were shown in the lecture was by Emile Cohl called the Fantasmagorie, that was created in 1908. It has often be positioned as the very first animation ever, I found that this animation was very creative and different, but also very hard to understand in places as the animation moved very quickly so I couldn't understand what was happening in some cases. The animation is created using only two colours which are black and white, it is also a silent animation but music is played over to give it a cheery and happy feel to the design. The storyline of the animation was pretty simple to pick up and understand that it was based around a clown; however it moved very quickly for the how short the animation was to fit everything in. I also thought that the illustrations of the film were very simple and basic but easy to see and understand.


After this we then watched an animation that was like a stop motion called Prometheus' Garden, that was created by Bruce Bickford in 1988. I thought that the animation ran smoothly however I wasn't to sure what to think about this animation because I found it a little creepy and scary. Overall it is a very good design, I noticed that the animation and the set was created using something that looked a little like clay or play dough. I think that this design was created using lots of imaginative ideas and styles that are very different to other animations that I have seen and been created by other designers and animators. 

The final part that we looked at within this lecture was a Zeotrope which was invented in 1834 by a British Mathematician known as William George Horner. This allowed mass audience viewing and participation through multiple slots on the Zeotrope. I think that this animation is very complex but simple animation, also one of the most creative animations that I have seen in this lecture. It is quite similar to other devices like Phenakistoscope and the Praxinoscope, for the design and animation to work you have to spin the Zeotrope very quickly as it is turning you then can glimpse through the gaps to see the animation work, I think that it is quite clever how it is put together and works. I was very fascinated and interested to see this animation in more detail.


Overall I found that this lecture was very interesting as I learnt a lot about the Histories of Animation in more depth. I think that this is something that I may look back at in the future to see how animation has still changed overtime to remind me of where animation first started. 

Seminar #1 Introduction - Polina Zioga

The first thing that we did in this seminar was to look at Unilearn, where I could find the Module Guide Book which I have already printed off and placed in a folder. The theory as practice section is split into two where the theory blog will be assessed by a Presentation and the other will be a 2500 word essay. The module guide book tells us about the deadlines that will be happening throughout the year for the Theory as practice Module.

What is 'Theory As Practice' for you?

This is to start to learn how to research the history of Graphic Design and Animation, also what other people do. This year we are going to be focusing on ourselves and the path that we are going to take.

What is Research?

What - Theme/Research the subject
Why - Context/The background and the Literature Review
How - the approach/methodology and the methods that you use. How will you approach the subject or the piece of work
What - What is the Outcome/Results and the conclusions. Also what have you learnt throughout the project.

I found out that Research leads to Originality and research is part of the professional practice.

Year 1 - Foundation
Year 2 - Transformation
Year 3 - Professionalism
Final Year - Independence and Originality

We then looked at a quote by George Lucas, I found that this quote is very inspiring and tells you that you can accomplish anything that you want, and technology plays a major part in this, as it is changing, which is making design stand out more and become better than it ever was.


We were told that all creativity at all levels is just technology; it is fundamentally just research. We then looked at an example of a campaign, where we were given the task to use the research method to write down your answers to the questions that we need to answer. The example that we as a group chose was from the red Dot Award called Hear The Human Story. Here is what we came up with:

What - What is the subject, the theme? 
It is a tv and online documentary and a campaign that puts humanity back into the news. 

Why- How does it relate to the clients needs?
It is for people to understand that the company goes beyond the headlines of the global news to find real human stories that do matter.

How - How did the designers approach the assignments?
They went to visit them, there were six people in total from 6 different countries. They deliberately directed it in a elegant cinematic style. 

What - What was the final result and achievement? 
Reaching thousands of people online and millions via the TV, this campaign did not only position a brand, it injected humanity back into the news and gave a voice to those who are often forgotten about by other platforms and networks.

We were then told for our next seminar session with Polina that we need to research into topic of our choice that we were going to create a presentation about. We also needed to think about why and how we could investigate into our chosen subject. I found that this seminar session was very interesting and because it was something new. 

Wednesday 28 September 2016

Process and Production Sara - Lesson 1

This was my first Process and Production lesson of second year, I was really excited to start and learn new skills so I can expand my knowledge on the different style, medias and softwares that we will be using throughout the second year.

The first thing that we did in the Process and Production lesson was watch a short animation clip that was called 30 Motion Tests in 30 Seconds. I found that this animation was very creative and inspiring because it was different motion graphic pieces in one animation. I thought that the designs flowed really well and connected with each other, which I think is very important when putting an animated and a motion graphic piece together. I also like the style, font and colours that have been used in this design because I think that they stand out well, which is also a very important factor. The music and sounds that have been used within the animation fit well with the effects and motion tests that are happening throughout the film. I think that in the future I will take inspiration from the design again when created my own animated piece.

Here is the animation below:


30 motion tests in 30 seconds from Steffen K on Vimeo.

We were told that throughout second year we will have to create 5 ten second clips and a showreel of our final pieces at the end of the year in the process and production lesson with Sara. We had also been to told that we needed to consider how we our going to present our final pieces, our options were to create a channel on Vimeo, which would hold all our work together. To create a channel on Vimeo you need to go to your account, then select channels and then select the option that says create channel. Finally follow the instructions. Another option was to create your portfolio on a website called Styles.persona.co because you can choose from different styles and then select the one that you like the most, however the disadvantage is that it is £3 a month. 

We then moved on to our own animation, the first thing that I did was create our shapes or items that we wanted to use in Illustrator, I found this very straight forward. I decided to create a Hexagon (Burgandy), Circle (Green), Triangle (Yellow/Orange), Diagonal lines (Light Blue), Background (Yellow). After this we then watched another video called Spherical Video that can be found on Vimeo, once we had done this we then opened the programme Adobe After Effects and created a new composition that we could work with for my animation. The first part that I did was to create my diagonal lines and stripes on my comp, I then created a new background colour and foreground so that the animation that I was going to create would work. To do this I went to Layer > Solid, which opened up a new tab, I then selected then selected the foreground colour layer I did this because I wanted to add an effect to the solid colour. To do this I had to select the option that was Effect > Transition > Venetian Blinds. Before I applied this effect to my design I need to change the percentages of the options within this effect so that it would work.

I changed the transition completion from 0% to 50%, the direction to 30% and need to make sure that at this point the timer was halfway through the timeline. I also changed the width to 70%, after this I had to open up the layer in the menu at the bottom of the screen to the left side of the timeline and press the stopwatch for the layer and the comp. I then went back to the back to the start of the timeline and once again changed the transition completion from 50% to 0%, this then automatically put me a new keyframe.

We then moved on and created a composition and were told to call this Shape Test. I had to copy and paste my hexagon from Illustrator on the new layer (solid) in After Effects, to do this I used the keyboard short cut which was cmd + c. I then used the pen tool to select a place that I wanted to paste my shape into and then used cmd + v to paste it onto the layer. We then looked at the Wiggler Paths, which allow your shape to wiggle, to do this I had add the Wiggler Path. To make this effect work, I need to change the amounts. The first was the size which I changed to 63, the detail to 7, the point to smooth and the wiggles to 11, I found that this was a fun tool to use.


After this we looked at a new tool, which was called the wiggler. This is a tool that makes the object of your choice shake. The first part that I had to do was to again create a new composition and name it as the wiggler, I then chose to work with the circle that I had created in Adobe Illustrator where I copied and pasted the shape on to the new solid layer that I created for this composition. I found that the circle that I had pasted was very small and I need to make it bigger and more visible to me. I then moved onto open the layer and click on the transform option and select the position stopwatch, where I then moved the line on the timeline to the end and create a new keyframe by clicking the diamond at the side of the stopwatch. After this I had to open up the wiggler effect, which was located on the menu on the left side of the programme and select the keyframes and change the frequency to 12.0 and the magnitude to 10.0. I had to change and ask for help for this part because it wasn't working for me. Once I had been given help I was then able to press apply.


We then moved onto looking into a new tool called the Shape Morph, which I found was a really interesting tool to use in my design. I firstly selected the Shape Morph tool and changed the duration to 2 seconds and again copied and paste my chosen shape on the solid layer, the shape I decided to use for this design was the Triangle. I then click on the shape layer and select the contents option > shape > path > and then clicked on the path stopwatch, where this would then create a keyframe at the start of the timeline. I then moved the line to 1 second on the timeline and used the pen tool to make the triangle into a different shape by adding extra points to the shape that I had before. After I had played around with this tool I thought that the shape that I had morphed my triangle into looked like a Rabbit's Head.


For the rest of the animation I had to create several other designs using the tool and methods that I had learn't whilst in this process and production lesson. So I decided to copy and paste the background stripes layer and change the hue and saturation, so that the colours I was using would have a contrast between bright and dark colours in the animation. The next animation that I created was a circle using the Wiggler Path and a Hexagon Morph.

However I firstly had to created a title for this animation. To do this I had to create a new composition and use the text tool to add a name to my animation, the font style that I decided to use was Avenir Next Condensed because I thought it was simple and easy to read and wouldn't cause any problems for me. I placed the stripes layer to the back of this and changed the stretch to -100.00% so the stripes would open and close a different way.

The final part that I did in this process and production lesson was to create a final composition that would be made up of my final and little animations that I have created throughout my process and production lesson. I needed to make sure that I rendered out my video out as an Apple ProRes 4444, to get the right quality. I found that this process and production lesson was fun and I am going to looking into these tool later in my own time and future to experiment with them even further and see what I can create.

Tuesday 27 September 2016

First Studio Session, What is Cybernetics?

In this studio session, I found it hard to concentrate because I really didn't have the faintest idea what this brief was about. So at first I found it hard think about an idea for the studio brief that I had been given for my first project of second year. So the first thing that I decided to do in this studio session was to look up the terms that we had been given. I thought that this was the best start that I could do to find away to get an idea for this studio project.

What is Autopoiesis?

Autopoiesis means yourself, you as an individual. (Poiesis) is a Greek term that means the creation. Together it means Self Creation.

What is Network Self?

Network Self is an Identity, that is used to show you as a person through the internet or the use of different social medias.

What is Cybernetics?

Cybernetics is the self moving control system and science of communications that occur in both living things and machines.

What is Sociomaterial?

Sociomaterial is the way that sociology and technology interact with each other. For example, the way that political views or an acceptable language (behaviour), is displayed or presented through different types of media.

First Studio Seminar - 11:15 - 12:15

This was my first studio seminar of second year. I found that this session was ok because I still hadn't got an idea for my studio project. The first point that we looked at was how different are we from others, thinking about this point in more depth I think that this point is very interesting because people are very different to each other. We were then told that this year is very important and its about us as individuals, which got me thinking about the previous point that we had just thought about and what describes and features do we have as an individual and what makes us as an individual stand out from the other people. So what do I want to do? What sort of career path do I want to take after university. What area would I like to do?

We then looked at Autopoiesis, which is Self Making and re identifying myself, it means using different languages and self identity. After this we talked about the idea of yourself or self and how the world sees you or how you see the world, I thought that this was a very important point and we should always think about this point because it could mean that we see the world as we do, but other people see it very differently and we should always consider the different ways that we could design, to make it fit with the target audience that we are aiming it towards and make sure that it works.

Who are you? That is a very important question that we are going to be thinking about this year because we need to find out what sort of designer we are going to be. We were told that we should explore as many different styles as possible this year to help us narrow our choices of styles to see which we are good at and those that we aren't so good at. Another important point that we were given was to always use a sketchbook to do our ideas because they are very useful and finally document everything that was said because we will be able to look back at this.

I found that this seminar was good because it got me to think about what I could do for the brief that we had been given, as I was still stuck for an idea before this session. However I thought that I still needed extra help to work out what I should do? 

Cybernetic Self Introduction

Within this lecture, the first thing that we were told about was to make sure that we used are blogs throughout the year because they're very important to do this year. As it is used to show our pieces of development and design work throughout second year. We need to make sure that we blog about everything, for example:
  • Theory as Practice
  • Studio
  • Process and Production 
  • Lecture and Seminars
  • Work that we do at home to do with Studio Work 
  • And finally the teachers, tutors and lecturers feedback is very important to blog about. 
So if we speak to a member of staff, we need to always make some notes about the feedback that you're receiving, as this will become useful to look back at. It will also help you throughout your studio projects. 

We then watched a video about the Jamison Family, who show there friends and us a guide to the internet. The video was called Early 1990's Internet Commercial, I found that this film was very interesting, but strange at the same time because it wasn't like anything that I had really watched before.


After this we were then given our first brief of Second Year, which is Cybernetic Self. It is a 4 week project, where we need to include Research, Development and the Actual Output. Once we had been told the name of our brief we were then told that we must always consider these three terms throughout this project. Non of them I had really of before, however I was intrigued to find out what they all meant. These were:
  • Autopoiesis
  • Sociomaterial
  • Network Self 

Once we had looked at this, we then started to talk about self presentation, social connection and how people are branding themselves through social media. I found this part very interesting because this statement could mean many different points, it could mean that people use social media to show the world there design work. However, another point is Catfish which is people hiding and branding themselves as some that they're not. It could also be used to show people what interest you in the world, for example we use social media like Facebook, Instagram and Snapchat to show Friends, Family and the world about you. 

We were then shown someone called Amalia Ulman, who is a fine art student that decided to explain a story that was made up through the form of photographs. She took 175 photos within 5 months. I thought that this very interesting and very creative. 

Sociomaterial 
  • People
  • Materials
  • Equipment
  • Institutions
  • Components
Autopoiesis - Its own processes.

We then watched a documentary called Foundational Principles Of Cybernetics. I found that this documentary was quite interesting and very informational, as it contained lots of facts about Cybernetics.

What defines us?

How does interaction with other affect that? Redefine the self portrait, the selfie. 

Outcome

Graphic Design - A Printed Document. (Magazine Supplement).
Animation- A Digital Short, Moving Image or Animation

Week One - 27/09/2016
Idea Generation - Research 

Week Two - 04/10/2016
Formalise and Develop Ideas 

Week Three - 11/10/2016
Begin Composing Final Output

Week Four - 18/10/2016
Refine and Finalise. 

I am really looking forward to this project because it means that I can be very experimental and look into things that I wouldn't normally look into. I want to be really creative with this brief.   


Monday 26 September 2016

Business Lecture Introduction 16/17

Our first theory as practice lecture was with Peter. T. T. Norris.

Once Peter had introduced himself to us, we then started lecture and first looked at what does the industry want from us? We told that the most important parts that the industry look for is:

  • Independence 
  • Self Thinking 
  • Analysis Ability 
  • Confidence
He told us that we need to think about what career path we want to follow after our Graphic Design and Animation course, which parts of the industries do we want to work in or do you want to work for your own business. Another possibility is to start to look at placements throughout the year, I thought that this section was very interesting as I am wanting to take a placement after 2nd Year but before 3rd Year. We were told to start looking into placements and industries in design, also we need to start to talk to someone about future placements. We were told that we should engage and live our lives and to find out things we need to make sure we talk to someone, so that we understand. 

Regret is ALWAYS more painful than failure. I do agree with this statement because I think that I have regretted not doing stuff and going further with a piece of work or an idea that I had in mind. 

We then started to talk about how our course is broken down, which is:

120 Credits in the first year
120 Credits in the second year
120 Credits in the final year

However, Year 2 is worth 1/3 of our degree and Year 3 is worth 2/3 of our degree. But our degree classification is made from the best 100 credits in year 2 and the best 100 credits in year 3. Although we need to pass every module and the pass rate is 40%. 

We were then shown how the degree classification is broken down in percentages: 

First class 1st - 70%+
Second Class, 1st Division - 60%-69%
Second Class, 2nd Division - 50%-59%
Third - 40%-49%

A - 70%
B - 60%-69%
C - 50%-59%
D - 40%-49%
Anything below 40% will lead to a fail. 
We were told that we needed to start and consider our work load, as time goes on for each project. 

Placements 

We then started to talk about Placements, I found this very interesting because I am going to be looking for a Placement this year, but for the next academic year. The first thing that we need to do to find a placement is to go onto the internet and look different design houses and make a list of the industries and design companies that take your eye. Then make some notes about the companies and research them in more depth. We need to start applying for placements if we are wanting one as the window for the top placements with the best companies are between Early October to the End of October/Beginning of November. So we should apply soon. We were told to look at Agencies like IPA, which is the Institute of Practising Advertising and another company called Pinewood Shepperton, where we should look at something called on the lot. This is a page that you can see about different jobs on the sites of the Film and TV productions taking place, as there maybe something that you might like. 

There is also a site called Free Index, which is a business website. To get the manager or team leaders attention we were told that a letter would be the best option as it is harder throw away or delete like email and another important thing to do is look into the designers or agencies work and comment on posts or work that you the most. I found that this would good advice when looking for a placement, as I want to be in front of other people that are wanting to get a placement next year, we have to also think about what do they want me to do, and will I fit in and can the director, designer or agency see me working with there team. I think that this is also an important point that I need to consider in the future. I need to also make sure that I don't fluff up my words or interview, however there 1000's of design companies and agencies that are worldwide to consider looking at. I also need to update my CV and the sooner this done, you'll be front of others.

Peter also suggested that we need to look at portfolio's of work that we would be able to send to the design companies or agencies and start to put this together. Although we shouldn't worry about this too much right now. We could also start to look at competitions that we could take part in, to try and get people notice our work. Competitions like YCN, which I have looked at before and other design competitions that look interesting to take part in. There is two routes that you can take when your doing your placement the first is your university route, which makes sure that placement is a valid placement, where you also receive 2 visits a year from the university or you can suspend your course at any point however you will be on your own. Most important thing is to not work. 


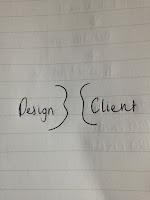
We then looked at the what is needed from the design and the client. We firstly looked at the client, where we looked at questions like where is the client coming from? What industry? What Subject? Who is it that the client would like you to talk to? Who is the audience? After this we looked at the design side, so how does the design need to look? It needs to look good and suit the client and the audience that you are aiming your design at. 

Product Orientation- I make this product. Where is my market?
Market Orientation- I have these assets. What do you want me to do with them?

Firms
  • Manufacturing
  • Sales 
  • Management 
  • Finance 
  • Marketing
  • Etc. 
Markets
  • Competitors 
  • Suppliers 
  • Customers 
  • Clients 
National Economy and Global Economy

We then started then started to look into the national and Global Economy. 

National Economy
Geographic Entry - A Country
Private Sector – Firms, Companies, etc
Public Sector – Financed by tax revenue
Schools, Government,
Police, Armed Service 
Hospitals etc 
Government / Law

Global Economy
World Trade
Economic Blocks

Micro Economics - Firm, Markets 
Macro Economics - National Economy, Global Economy 


It all fits into one. 

When talking to a client it is important to know who they are. The next part that we did in this lecture was talk about Basic Marketing, where we were told to consider the 4 P's, which were: 

  • Price 
  • Product 
  • Promotion
  • Place
The first P that we looked at was Price, where we need to consider the cost. As it costs to manufacture, deliver, package and it also cost the admin and management. The profit element mark can be very high 100%+ in some instances. We were also told about loss leaders. 
The next P we looked at was Product, were I found out about the two different types of products, the first being a core product and this is what it must do and what it does. The next product is the secondary product, which is why does the consumer buy the product. You need to also consider the colour and what the product looks like. We then looked at promotion, which is how to tell/persuade people to buy your product. This section is the advertisement part of the process. The final P which is Place, we looked at where will the product be available. The Internet, a shop. Also where will the place of consumption be? The office, the outdoors or at home. 

For the final part of the lecture we looked at what is design and the design process that we need to take to get a final outcome. 

What is Design?  

  • Its a visual communication
  • Problem Solving
  • Creativity
There are two types of mental processing, these are convergent thinking and divergent thinking. 

Convergent Thinking - This is consider the problem and slowly slice your way through the problem
Divergent Thinking - I am divergent. You think about the problem differently and say here is my design solution, however you will have to explain your solution so that others will understand you. 

The Design Process