Step 1- A character to animate 'it' has to do something.
Step 2- Stories. You need to explore and discover the human condition... what makes us tick.
Step 3- Realise the Impossible.
Step 4- Suspend Disbelief
We firstly watched a short animated piece of work called the Lighthouse. The music that has been used for this animation is jazzy and is very well connected to the animation. The storyline of the animation is well put together. The style that has been used for the animation is creative and easy to understand, as the style that has been used is Illustration. The plot points were odd to the animation, but increased the climax of the film.
We then watched another clip called Pixar Luxo Jr, within this clip we had to look out for the central crisis and the climax.
What is the Central Crisis?
The central crisis in this clip is that the ball deflates and the little lamp is being comforted by the big lamp, which is the parent lamp.
Within this we are firstly introduced to the parent lamp, the ball is then rolled onto the screen. This is the introducing the ball to the parent lamp. After this the little lamp starts to play and bounce on the ball, which then pops and deflates. After this the little lamp gets upset and comforted by their parent, which signifiers playtime is over.
Once we had watched this clip, we then another clip about a mouse being trapped in a mouse trap, who survives. Within this clip, we are firstly introduced to the mouse, the mousetrap and the cheese. The mouse then starts to eat the cheese, after this the mouse then climbs onto the mouse trap and inevitable happens. We then see the mouse starting to workout and exercise, as he has survived the trap. In the end of the clip, it is all about the cheese being seriously strong, which is relevant to the mouse exercising on the trap.
The task, that we were given in this seminar was to create a storyboard around my visual proposal and how I could move forward within my Studio project. Below is the storyboard that I have created for my visual proposal and how I am going to go forward with my brief:
Step 1 Step 2
Step 3
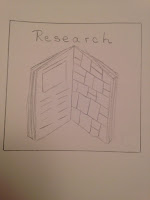
Step 1- The first part I had to do for my brief was to create a sketchbook that consisted of Primary and Secondary research, to help me come up with an idea for my proposal itself and the Sense of Place that I wanted to focus on, which was New York. The part that I liked in this step was that this process was very fun, as I was able to explore in different parts that I haven't researched into before. I was also allowed to broaden my skills and work on my existing skills that I had already gained. The part that I found hard in this step was the Primary research, as I found it harder to research the topics that I had been given rather than the secondary side.
Step 2- The second part that I have displayed in my storyboard is that I am going to overcome my research and create a proposal by creating a mind map to write down and expand on my own ideas that I can use to create my project at high standard. Once I have created mind maps of my ideas, I have to then create a mind map of points that I have to research for me to look at different ideas that I could look at creating for my Sense of Place project.
Step 3- The third part that I have displayed on my storyboard is a drawing of a computer that is displaying different websites that I am going to use for inspiration for my own design work. These websites consist of Tumblr, Google, Pinterest, NY.com and Instagram. I found that these websites will become the most useful and most helpful to me when looking at creating my own ideas for my project work.
Step 4 Step 5
Step 6
Step 4- For the fourth part of the storyboard, I have Illustrated a sketchbook of some of my drawings I am going to produce after I have researched into different inspirations from the different websites that I am going to be looking at. To Illustrate my designs in my sketchbook, I am going to use different materials like Pencils, Felt Pens, Paints and Coloured Pencils. I think that Illustrating my ideas down in my sketchbook will allow my ideas to be easy to understand better if my designs were displayed in my sketchbook.
Step 5- For the fifth part of the storyboard, I have displayed a computer and above the laptop I have shown the software programmes that I will use to create my designs digitally. However, I think that it would look good if I was to keep the Illustration style for my designs. Furthermore, I would still like to see how my designs would look digitally compared to my Illustrations in my sketch book. The programmes that I have considered to use for my designs are Adobe Photoshop and Illustrator, because I think these programmes are the best suitable programmes to use for my design work on the computer.
Step 6- In this sixth part of the storyboard, I have shown an Illustration of my laptop displaying the word InDesign in the centre of the screen, as I my final task would be display and layout my designs using the programme Adobe InDesign. I am going to use this programme to display my work and design because I think that this will allow me to display my work professionally.
Overall I think that this seminar task, will defiantly help me in the future to display my ideas and process further.


